CSE 493/593 Fall 2024
Shared Space Setup
Optional
for ALL teammates: Create project link
Creating a symbolic
link to the project directory is useful for quick & easy access to your
shared project files.
To create a link to
your project directory, follow these steps in the terminal:
1. Change
to your cse493_593 directory:
cd ~/cse493_593/
2. Create
a link to your shared project directory:
ln -s /shared/projects/CSE493/team-{letter}
Replace
{letter} with your assigned team letter.
For
example, if you were part of team k, you would enter:
ln -s /shared/projects/CSE493/team-k
You should now have a
new directory link in your cse493_593 folder. Type ls -l to
verify.
For
ONE teammate: Create shared project
Have one of your
teammates create the project library.
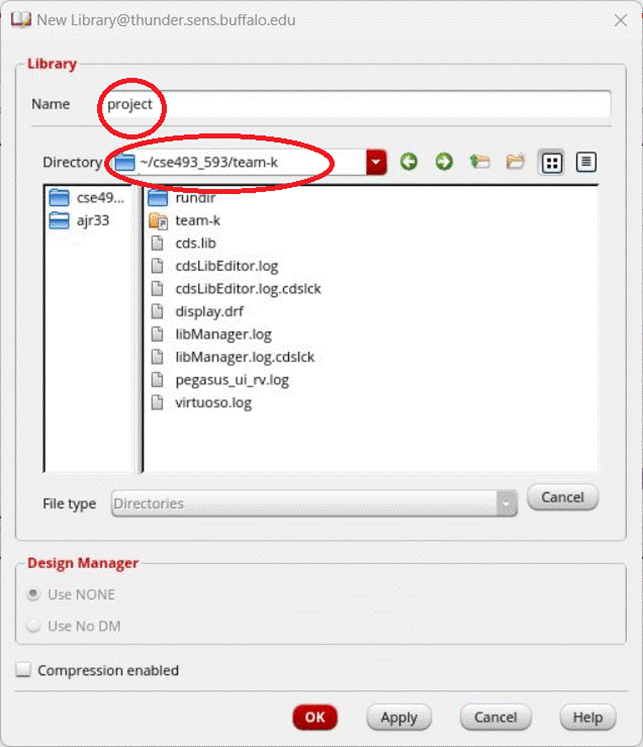
1.
In the Library Manager, click on File -> New
-> Library
2.
In the dialog box, give the project a name
3.
Set the Directory:
REPLACE {letter} with
your assigned team letter
a.
If you created a project link, set the
directory to the directory link:
~/cse493_593/team-{letter}/
b.
If you did not create a project link, set the
directory path to
/shared/projects/CSE493/team-{letter}
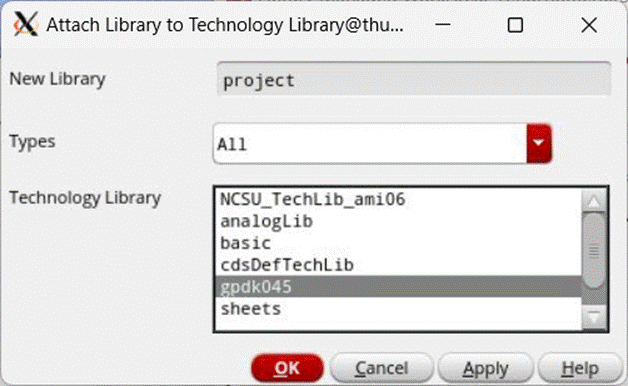
4.
Select “Attach to an existing technology
library” when prompted & click OK.
a.
Pick gpdk045 & click OK

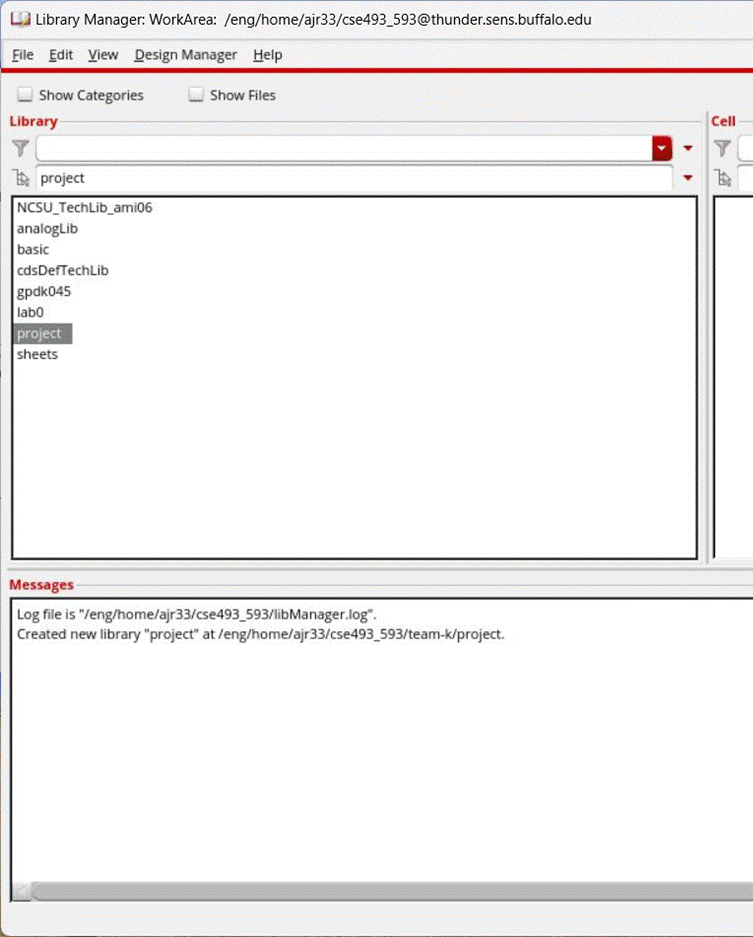
You
should now see your newly created project in the library editor.
5. Give
access to the library to your teammates, go to the terminal & type:
chmod -fR
2770 ~/cse493_593/team-{letter}/{your project}
Replace {letter} with
your assigned team letter.
Replace {your project}
with the name you gave your project.
For example, if you are
part of team k & you named the project “project” you would type:
chmod -fR 2770 ~/cse493_593/team-k/project/
Alternatively,
if you did not set up a directory link, you will need to use the full path:
chmod -fR
2770 /shared/projects/CSE493/team-{letter}/{your
project}
For OTHER
teammates: Add shared project
The other teammates
that did not create the shared project will need to add it to their Virtuoso
path with the following steps:
1. Go to Edit
-> Library Path…
2. In a blank
cell give a name for the library (this is what will show up in the Library Manager)
3. For the
path, point it to the newly created library that your
teammate created.
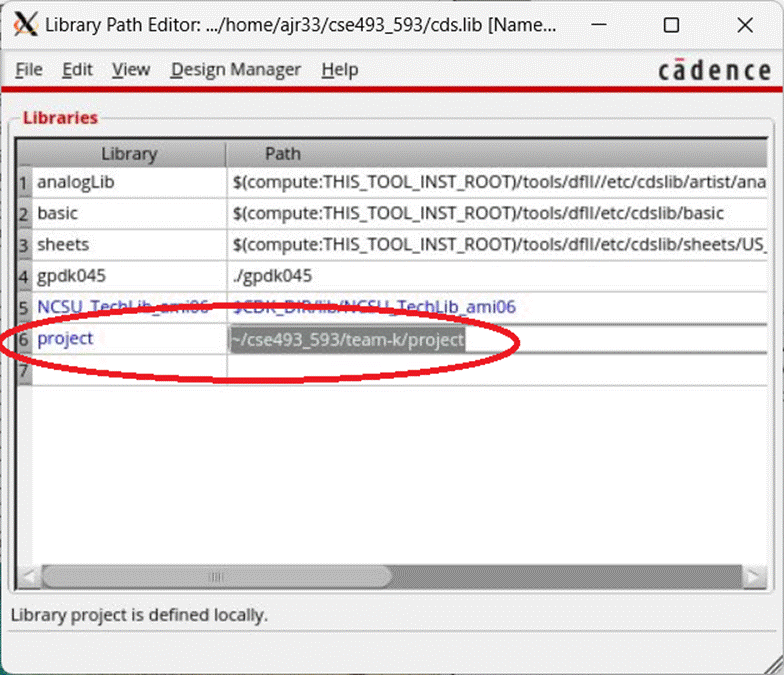
4. Go to File
-> Save or use CTRL+S to save the library. There should be no
errors & it should highlight blue to indicate a valid library was found.
5. Close the
Library Path Editor.
You should now see the
project in the Library Manager.
For ALL
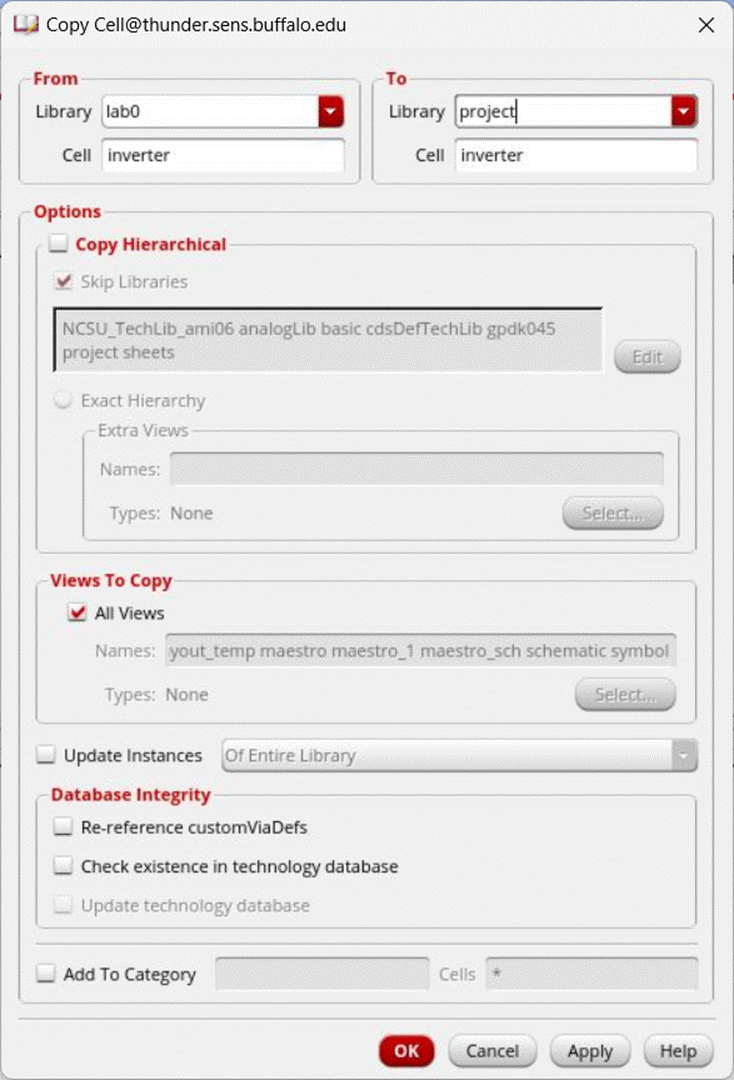
teammates: Copy files to shared project
To copy designs that
you already have made to your shared project, right-click on the library/cell/view
that you want to copy.
Make sure that the “To”
section is pointed to your shared project. You can give the cell a different name
if multiple versions are included to avoid naming conflicts.
Click OK to begin copying
the files. Overwrite “data.dm” if prompted. If other files are to be
overwritten, check to make sure that you don’t overwrite the wrong files.
Copied
files are by default set to read/write only for the owner of the files. To give
your teammates access to read/write files go to terminal & type:
chmod -fR
2770 ~/cse493_593/team-{letter}/
Replace
{letter} with your assigned team letter.
For example, if you are
part of team k you would type:
chmod -fR 2770 ~/cse493_593/team-k/
Alternatively,
if you did not set up a directory link, you will need to use the full path:
chmod -fR
2770 /shared/projects/CSE493/team-{letter}/
You
are now ready to work on your project together. Remember that all files added
later that were created locally will need to have the permissions changed with the
above commands.
Images & tutorial created by Anthony
Roberts October 2024.